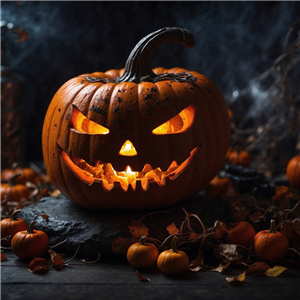
Halloween is the perfect time to get crafty, and what better way to add a spooky touch to your home than with homemade candles? Creating your own Halloween-themed candles is simple, fun, and allows you to customize them with your favorite scents and eerie designs. Whether you want to create ghostly white candles or pumpkin-scented beauties, follow this guide to make your Halloween candle-making a success!
Materials You’ll Need
Before you begin, gather all the materials needed for making your Halloween candle:
- Wax (soy, beeswax, or paraffin)
- Candle wicks
- Candle dye (orange, black, or white for Halloween themes)
- Fragrance oils (pumpkin spice, cinnamon, vanilla, or lavender)
- Molds or jars (mason jars, skull molds, or pumpkin-shaped molds)
- Popsicle sticks or skewers (to hold the wick in place)
- Heat-resistant containers for melting wax
- Optional: Decorative items like glitter, stickers, or wax-safe paint
Step-by-Step Instructions
Step 1: Prepare Your Workspace
Lay down some newspaper or old towels to protect your surface from spills. Set up all the materials and keep your molds or jars ready. Make sure the wicks are pre-cut to the height of your mold or container.
Step 2: Melt the Wax
Using a double boiler or a heat-safe container over simmering water, melt the wax until it reaches a smooth liquid consistency. Stir occasionally to prevent clumps. Avoid overheating the wax, as it can affect the candle’s performance.
Step 3: Add Dye and Fragrance
Once the wax has melted, add a few drops of your chosen dye to achieve the desired color. For a Halloween theme, orange, black, or white work perfectly. Stir well until the color is evenly distributed. Next, add fragrance oil (about 1 ounce per pound of wax) to give your candle a spooky scent. Stir thoroughly to combine.
Step 4: Secure the Wick
Place the wick in the center of your jar or mold. Use a popsicle stick or skewer to hold the wick in place by resting it across the top of the container. Ensure the wick stays straight for even burning.
Step 5: Pour the Wax
Carefully pour the melted wax into the mold or container, leaving a small gap at the top. Be cautious as the wax will be hot! Allow the wax to cool for a few minutes, and if necessary, top it off with more wax to create a smooth surface.
Step 6: Let the Candle Set
Leave the candle to cool and harden completely, which may take a few hours depending on the size. Do not move or disturb the candle during this time, as it may cause cracks or uneven surfaces.
Step 7: Add Decorative Touches
Once the candle has fully set, trim the wick to about 1/4 inch. If you want, you can decorate the outside of the jar or mold with Halloween-themed stickers, paint, or glitter. Get creative to match your spooky décor!
Final Thoughts
Making your own Halloween candles is a fun and rewarding way to add a personal touch to your spooky celebrations. With a few simple materials and some creativity, you can craft candles that not only look amazing but also fill your home with delightful seasonal scents. Light up your creations on Halloween night to set the perfect eerie atmosphere!


 Comments are public, but your email address will remain private.
